To ensure a smooth transition from version 23 to version 24, you should back up and restore your system configuration. This way, your usual settings, profiles and printer definitions will be directly available in V24.
We have explained the following topics for you in this blog article:
- Requirements to back up and restore the system configuration
- Backing up system configuration from version 23
- Restoring system configuration in version 24
- Importing system configuration from a previous version via the Setup Assistant
- Restoring a previously backed up system configuration
In V23, you can also transfer the system configuration to V24 as before using the backup and restore function (Menu Options > System Configuration). You can find out how to do this in this section.
Alternatively, you can transfer the system configuration using the Setup Assistant, which is available in V23.10. This contains an import function with which you can quickly and easily transfer the system configuration from a previous version to V24. You can find out how to use the import function in the Setup Assistant in this section.
For more general information on upgrading to version 24, please also see our FAQ article. Please also refer to our article on version upgrades with activated Access Control Module.
Requirements to Backup and Restore the System Configuration
With a V24 license you can use V24 as well as the latest builds of the versions 10 to 23. You need at least the following builds to run older software versions with a V24 license:
- 10.34.8853
- 20.01.9223
- 21.10.11564
- 22.10.14176
- 23.11.16199
The corresponding hotfix builds are available on the Service & Support area of our website under Menu > Download > Software. These versions can be installed side by side on the same system and run alternately without any problems.
When switching between multiple installations, the previously unused product must be started once with administrative rights. This applies to both licenses with USB key and licenses with soft key. For licenses with soft key, the license must be revoked in the previously used version before switching to another version. To do this, selectProductionserver/Proofgate/Filmgate23 > Productionserver/Proofgate/Filmgate23 — Revoke license in the Windows start menu. A dialog opens in which you can start the revocation process. An active Internet connection is required for this.
If you are still using a previous V23 build, you should first install the latest V23.11 build before upgrading. You will need build V23.11.16199 or higher to be able to use V23 with your V24 license. You can find a hotfix build in our Service & Support area (login required) at Menu > Download > Software > Version 23 > Productionserver/Filmgate/Proofgate 23.
Backup and Restore the System Configuration via the Backup and Restore Function
Tip: If you prefer a video tutorial to written instructions, you can also watch our YouTube video on how to transfer the system configuration via Options > System Configuration:
Backing Up the System Configuration From V23
Follow the next steps to back up the system configuration via Options > System Configuration.
- Start the software, you want to create the backup from.
- Select Options > System Configuration > Backup… to open the Backup RIP Configuration dialog.
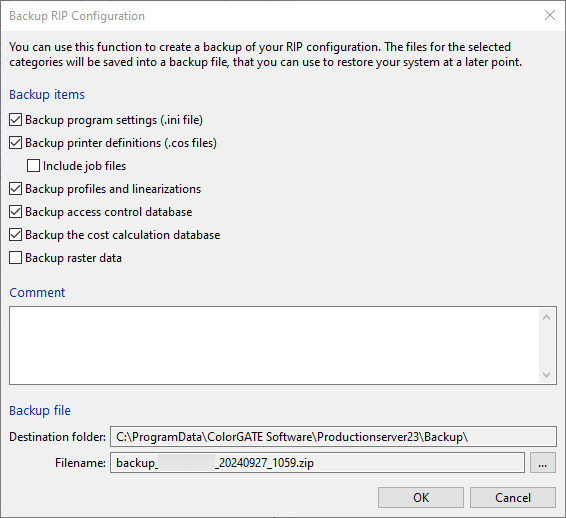
Backup program settings contains e.g., measuring device settings or the currently opened printers. The printer definitions contain, e.g., the hotfolder settings. You can also save all jobs with the Include job files option. This allows you to reprint them without having to rip them again. For profiles and linearizations, not only these files are saved, but also the entire MIM combinations. The settings of the Access Control Module and the Cost Calculation Module can also be backed up. The Backup raster data option is only needed if you use Filmgate or the Film & Plate Module for Productionserver and use your own screen sets. - In the Comment field, you can add a description for the backup, so that you can later identify what the backup was created for and from which state it was. Both the destination folder and the file name can of course be customized according to your own preferences.
- After clicking OK, a dialog box shows the size of the uncompressed data.
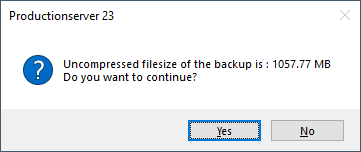
The larger the amount of data, the longer the backup process will take. - After clicking Yes, the data is compressed and stored in a zip file to save disk space. With gigabyte-sized jobs in the archives, this may take more than 10 minutes.
- Once the backup is complete, the software will ask if and when to remind you about the next backup.
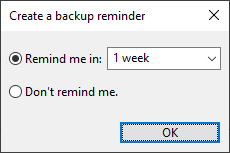
- The backup process is now complete. You can now import the backup of the system configuration into your V24 installation.
Restoring the System Configuration in V24
- Run V24 with administrative rights so that the required permissions are available during the import process.
- Select Options > System Configuration > Restore… to open the Restore RIP Configuration dialog.
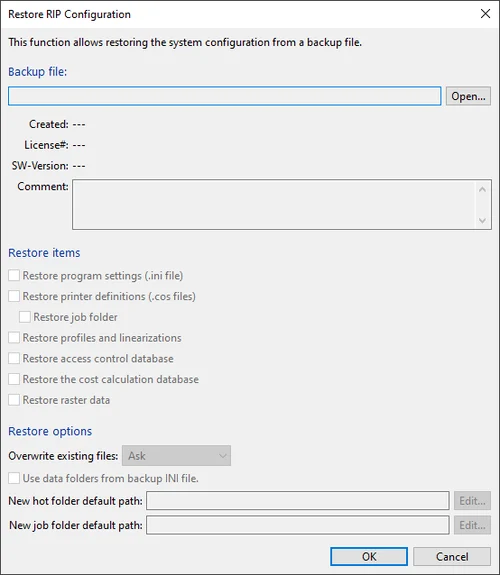
- Click Open and select the previously created backup file from the previous version there.
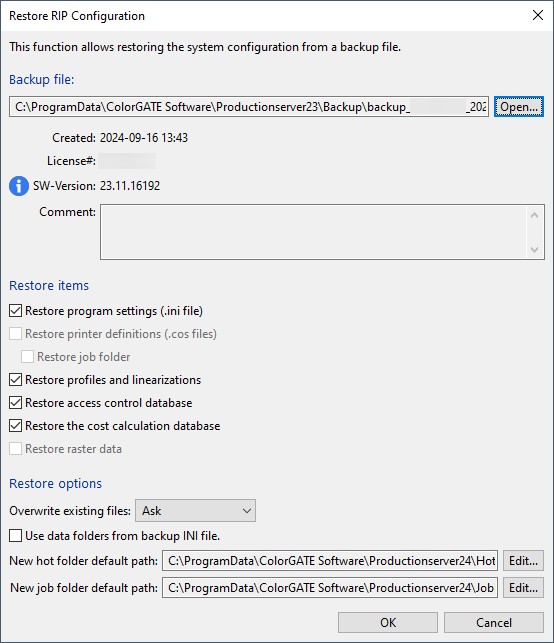
- Various information about the backup is now displayed, e.g., in which version it was created and which data it contains. The check boxes allow you to restore only certain data from the backup, if this is desired. At Restore options, you can choose whether existing data should be overwritten. In addition, you can decide whether you want to import the backup into the current default paths or use new paths. The archive folders (respectively the jobs contained in them) will then be stored there.
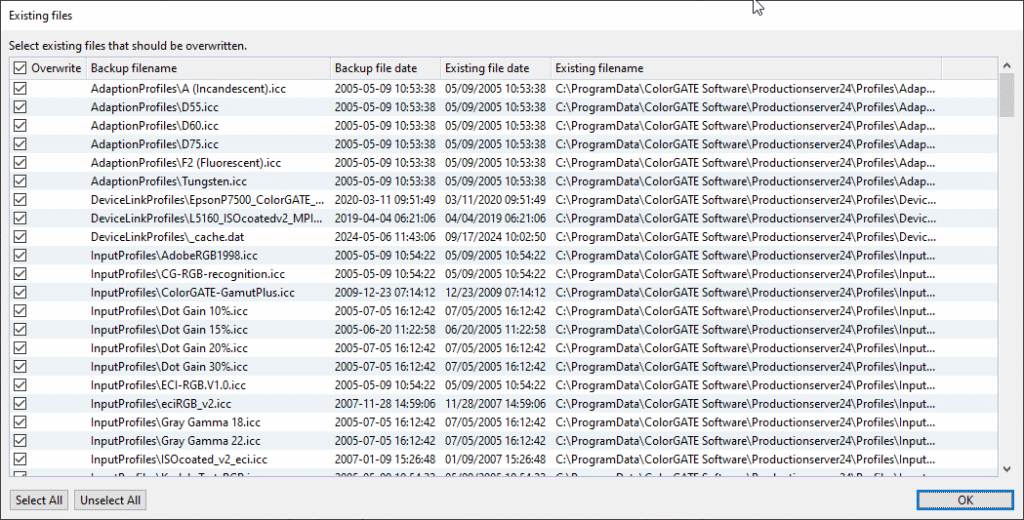
Note: If the data folders from the INI are used, this may result in the folders for profiles, job archive and hotfolder from the previous version being used. This can lead to conflicts if, for example, V23 and V24 are used alternately for a while, or if the V23 folder structure will be deleted. We recommend to use this option only when restoring a backup of the same version and not when upgrading to a new version. - After you have clicked OK, another confirmation request appears and, if necessary, the files to be overwritten are displayed. During a version upgrade, usually everything can be overwritten.
- After the import, restart the software. The imported data will be visible, and you can continue to work in V24 as you did in V23, although we recommend checking the hotfolder settings to learn for example about new options and possibilities of the new version.
If you are sure that you have transferred all the required data from the old version, you can uninstall V23. The data from the previous version will not be deleted when uninstalling. To free up disk space, the data must be deleted manually.
Importing the System Configuration From V23 via the Setup Assistant
If V24 or newer is started and no printer is open — for example after a new installation — a Setup Assistant will now open automatically.
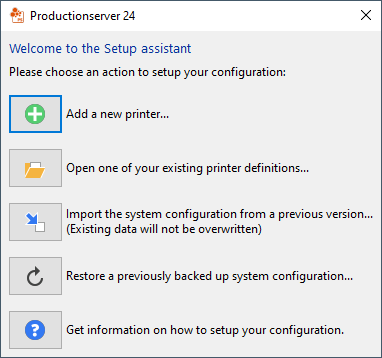
If required, you can also call up the setup assistant manually at any time by clicking on Help > Setup assistant…. Via this assistant, you can import the system configuration of a previous version into V24, without the need to manually back up and restore the system configuration.
Tip: If you prefer a video tutorial to written instructions, you can watch our video on YouTube:
Follow the next steps to import the system configuration from a previous version:
- Click Import the system configuration from a previous version. A dialog opens.
- Select the installed version to import from:
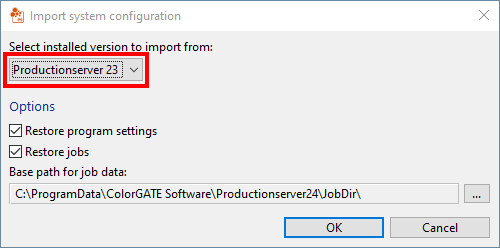
- At Options select the type of data you want to import into your new version. You can select Restore program settings and / or Restore jobs. The restoring of program settings makes sure you use the same settings as in your previous installation. If not selected, you keep your current settings. If you select Restore jobs, your job folder will be restored.
- Base path for job data: This is the path to store your job data. By default, it is the JobDir folder of your installation. Change this only if you want to store your job data in a special location (e.g., another hard drive).
- Click OK. After the import, you will get a confirmation that the selected data has been imported.
Restoring a Previously Backed Up System Configuration via the Setup Assistant
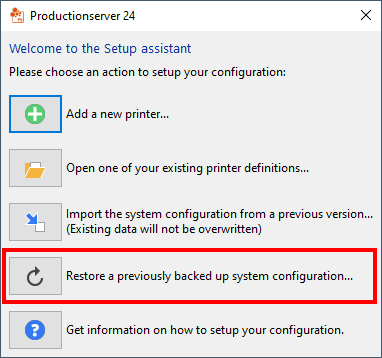
If you have already backed up the system configuration of V23, you can restore it quickly and easily via the Setup Assistant of V24.
To do this, click Restore a previously backed up system configuration…. in the Setup assistant dialog and follow the steps described here.
