
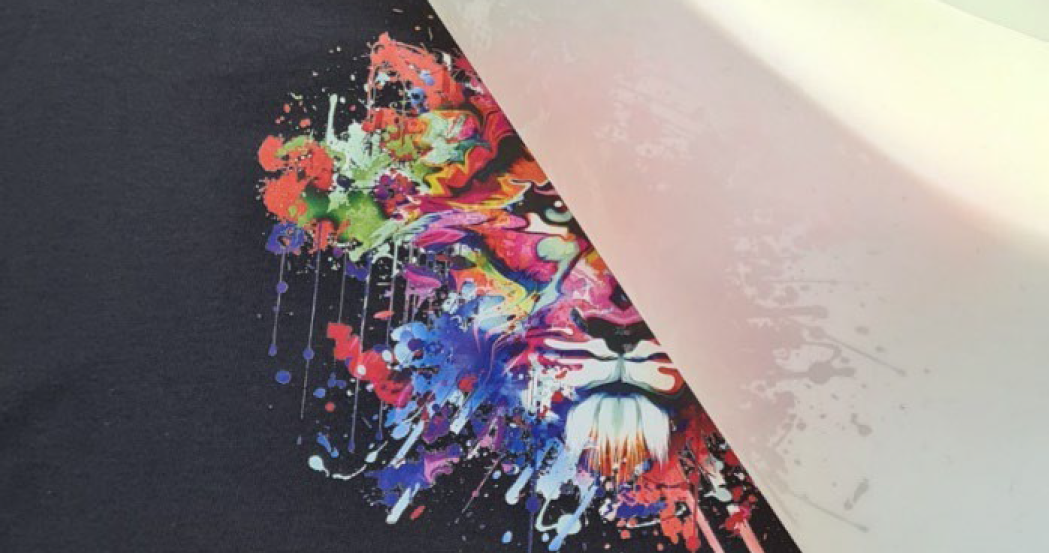
DTF – everyone is currently talking about this term in the textile industry and it is considered as an innovation in textile printing. And of course, ColorGATE Productionserver also supports this printing technology. But what is DTF?
With “Digital Transfer Film”, you no longer print designs on the textiles themselves, but on transfer film. After the printing process, the transfers are coated on the back with a hotmelt adhesive, which is melted on. Later, when the transfer print is to be transferred to the textile, only a heat press is needed.
This method offers numerous advantages:
- Pre-treatment of textiles is no longer necessary.
- Printing and transfer to the material can take place directly one after the other. However, the transfer films can also be printed in advance, stored, and then transferred to the fabric when required, using a simple heat press. This makes the process ideal for mobile use, e.g., at festivals.
- Since printing is done on film and not on fabric, much less white ink is needed.
- DTF is best suited for light, colored and especially dark materials (e.g., cotton, polyester, mixed fabrics, spandex, nylon, leather).
- There is no need for time-consuming weeding as with other transfer methods.
- Both single prints (sheet material) and large print runs (roll material) are possible.
- The prints are highly resistant to washing at up to 60°C, have excellent stretch properties and are exceptionally hard-wearing.
And what do you need for DTF?
You can use your existing DTG printer for DTF printing without any problems if the layering sequence C -> W is possible on this printer. Together with ColorGATE Productionserver, this results in a powerful DTF printing system. As of Productionserver version 21.10, ColorGATE supports not only Ricoh Ri 1000 and Ricoh Ri 2000 but also Brother GTX-422, Brother GTXpro and Epson SureColor SC-F2100 for DTF prints. These only must be equipped with the usual textile inks.
The other investments are very modest: You will need suitable transfer films and the corresponding hotmelt adhesive powder, which you can also obtain from the ColorGATE shop: https://shop.colorgate.com/en/consumables/cg-dtf. Furthermore, you only need a simple heat press and optionally a heating oven or a tunnel dryer.
TIP: We also have a video tutorial for DTF printing. Check it out here!
Then you can already start:
- In the first step, the RIP process takes place in Productionserver. For this, a few settings must be made in advance:
– In the Job Settings (or Hotfolder Settings) > “Job” tab, activate the “Mirror Output” option so that the design appears correctly on the material.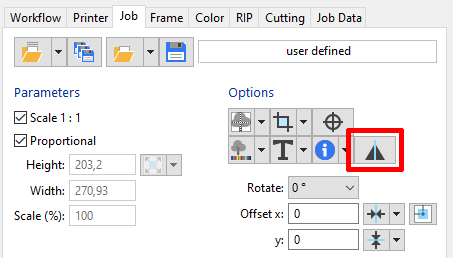
– Since with DTF the transfer film absorbs significantly less ink than textiles, the white coverage must be reduced.
We have already done this step for you and provide you with precisely fitting MIM’s for Ricoh Ri 1000 (MIM’s for other printer drivers will follow soon) and optimized for the transfer films offered in the ColorGATE Shop. The best thing to do is to download them from the ColorGATE Service & Support area and import them into Productionserver. Then all values for profiling and linearization are already optimally set. No further settings need to be made in Productionserver and you can proceed directly with printing the design onto the transfer film (step 2).Only if no DTF MIM is available for your system and you therefore use a standard DTG MIM, or if you use a different transfer film or you want to readjust the white coverage manually, make the following additional settings in Productionserver:
– In the Advanced Job Settings > “Print Mode” tab, set the “Intensity” for the special color “White” to 80-85%. This reduces the white coverage slightly. If necessary, you can still vary this value individually.
– Reduce the value for “Spread (+)/Choke (-)” to -2. This is related to the printer calibration, but also depends on the film used, so that you can also make further adjustments here if necessary.
– Then change the layering to “C -> W” so that the color is applied first, then the white ink.
- Now the design is printed on the transfer film:
NOTE: If you use a different film than the one offered by ColorGATE, please follow the manufacturer’s instructions for printing, drying and transferring the film.– Adjust the printing platen so that the distance between the platen and the print head is as small as possible.
– Place the film on the printing platen and make sure that the printable side (“print side”) is facing upwards and that the film is fixed to the platen (e.g. with adhesive strips, staples or a non-slip base).
During the subsequent printing process, the CMYK colors are printed first, followed directly by a white layer.TIP: For smaller designs, several graphics can of course also be printed on one film (e.g., space-saving via the Container function) and later cut out and transferred to the fabric separately.
- The next step is to spread the hotmelt adhesive on the ink while it is still wet:
To do this, place the printed film in a sufficiently large plastic container and sprinkle the adhesive powder evenly over the design. Spread the powder by moving it back and forth on the print and then shake the film slightly to remove any excess powder.
TIP: You can additionally brush away too much powder on non-printed areas. The excess powder can be reused without any problems. - The print sprinkled with the adhesive powder is now heated. This causes the adhesive to gel and fuse with the ink. The best way to do this is to use a drying oven or a tunnel dryer and heat the film in it at 160-170°C for 1-2 minutes.
If you do not have a tunnel dryer or drying oven available, you can use a heat press to heat the transfer film: Place the film in the heat press, but do not close it completely, but leave a gap of about 0.5 cm between the upper press and the film. Heat the film at 170°C for approx. 15-20 minutes.
TIP: Since the melting process depends on various factors (adhesive, ink, design, dryer), temperatures and drying times may vary. You can recognize the optimum fusion of printing ink and hotmelt adhesive by the fact that the print shows a glossy surface. If this is not yet the case, heat the film a little longer.

The transfer film is now ready for transfer to the material but can also be stored for a longer time.
- To transfer the design to the material, place the fabric on the heat press plate and place the printed transfer film on it. Make sure that the printed side of the film is on the fabric.
TIP: We recommend that you place a piece of baking paper on the film and only then close the heat press. Any powder residue of the hotmelt adhesive on the back of the transfer film could otherwise stick to the heating plate and tear the film off the fabric before it is ready when you open it.
Now close the heat press and transfer the design onto the material at 140-150°C for 15-20 seconds.
When the film has cooled, peel it off the fabric – and thus printing and transfer are completed!
NOTE: If you use a different film than the one offered by ColorGATE, please note that this can also be a hot peel film. This must be peeled off the material while it is still hot.
TIP: If you want to further improve the hand feel of the print, place another piece of textile (e.g., a tea towel) on the print and then press both again for 5 seconds at 140-150°C in the heat press. The structure of the textile piece presses into the print and thus optimizes the hand feel.
If you have any further questions about DTF, just contact us at contact@colorgate.com. Our DTF specialists will be happy to help you!