

Since you now know the differences between the densities and what measurement device is required to linearize our film we go into the software and create a linearization.
If you are using the software with a valid dongle you are able to get to the linearization assistent like shown in the next picture.
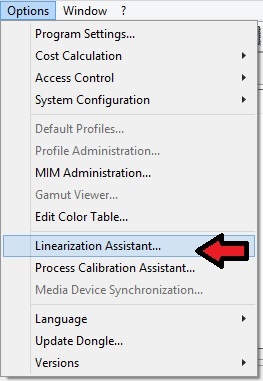
Now we choose to create a new linearization.
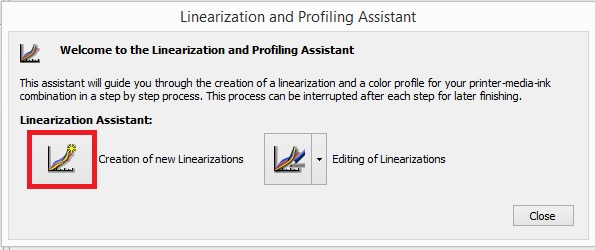
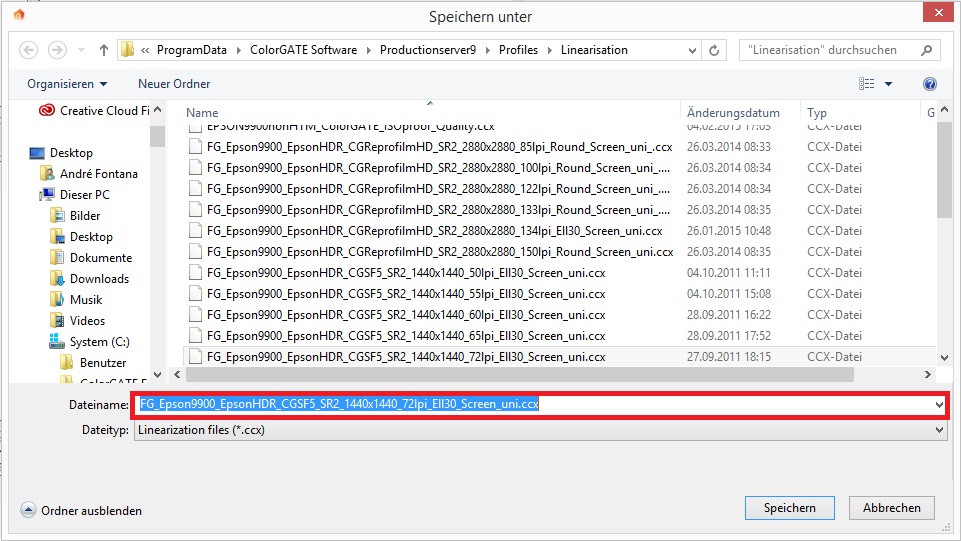
By clicking on “Creation of new Linearization” the following explorer window will appear and is requesting a name for the linearization and a directory for saving it.
Please give an appropriate name to the file like we did in this example and click on “Save”:
“FG_Epson9900_EpsonHDR_CGSF5_SR2_1440x1440_72lpi_Ell30_Screen_uni.ccx “
(Filmgate_PrinterModel_InkType_FilmMaterial_ScreeningMethod_Resolution_LineRuling_DotShape_AngleType/Workflow_uni-or bidirectional printing.ccx).
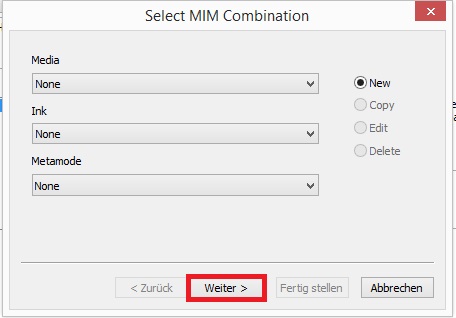
Now the assistant is opened and shows you the first step of the linearization process: defining settings. The settings can be defined by choosing an existing MIM combination or by creating a new MIM setting.
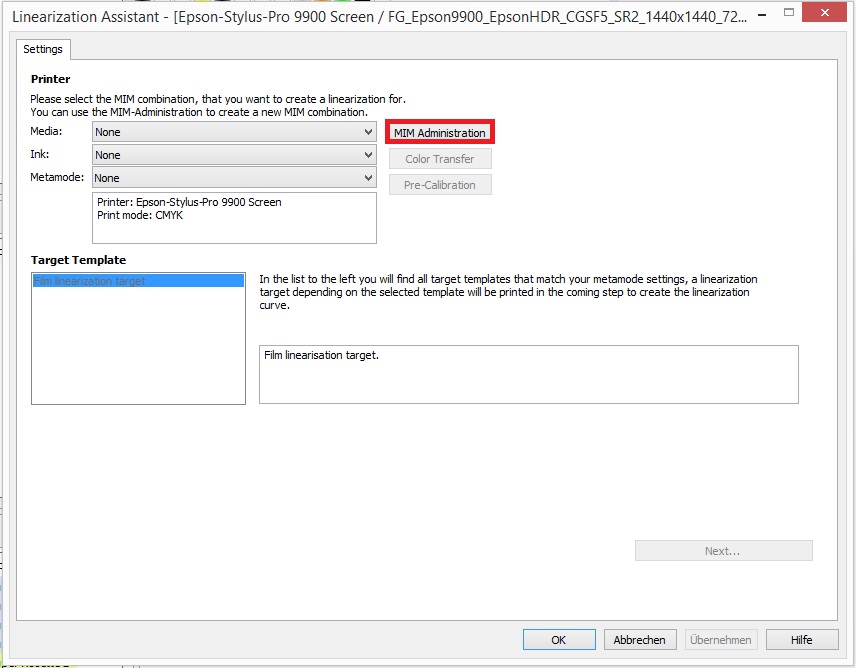
For the creation of a new MIM, click on “MIM Administration”, choose new and click on “Next” in the menu below.
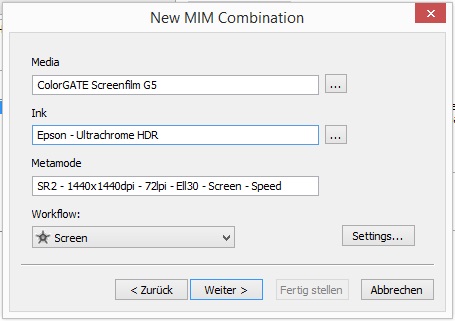
First of all you are requested to give names for “Media”, “Ink” and “Metamode”.
If you are going to create more sets for the same material-inkcombination, make sure that you give the exact name for the media and the ink for every MIM. Later this makes it easier to handle the
different MIMs by just choosing the different “Metamode”.
It is suggested to define a metamode name that includes the most important informations of the MIM set:
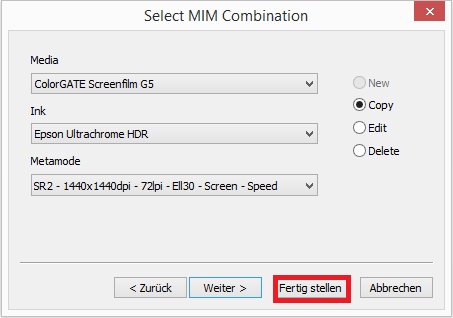
SR2 – 1440x1440dpi – 72lpi – Ell30 – Screen – Speed
(Screening Method – Resolution – ScreenRuling – DotShape – Angle/WorkflowType – Uni/bidirectional).
It’s recommended to define the settings for the “Print Mode” tab first.
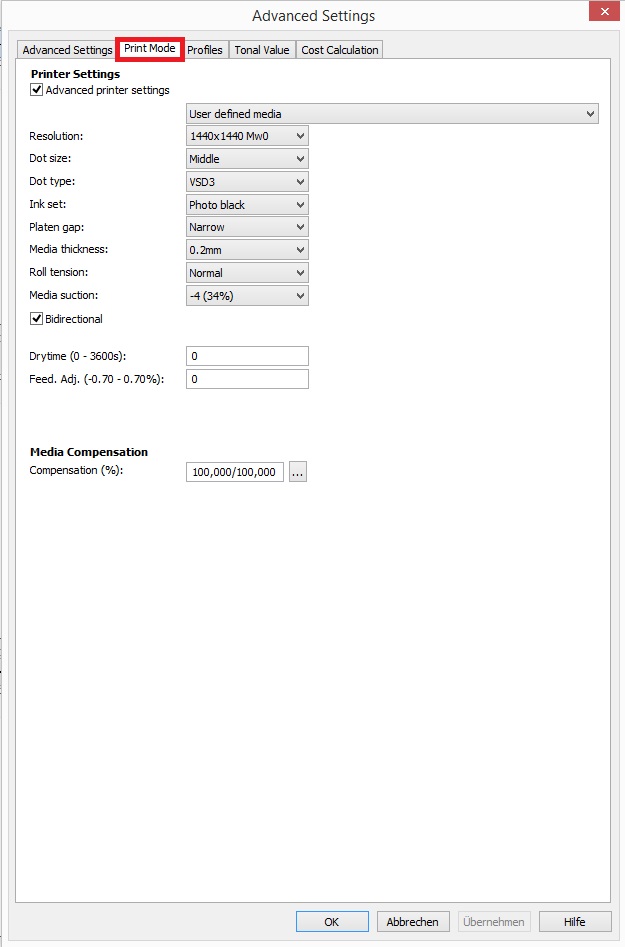
The activation of “Advanced Printer Settings” will lead to availability of:
• Platen gap
• Media thickness
• Roll tension
• Media suction
• Feed Adjustment
The shown settings are recommended for the use of film with EPSON x900 and x890 devices.
The value for the “Feed Adjustment” needs to be found in a length calibration of the EPSON and is not part of the linearization
process. So keep it on “0” at this stage.
Note that the resolution will have an influence on available screening sets for supercell screening in the “Advanced Settings”
tab. Most sets are linked to 1440x1440dpi and 2880x2880dpi(higher screen rulings). Try both resolutions to see which raster sets appear in the “Advanced Settings”.
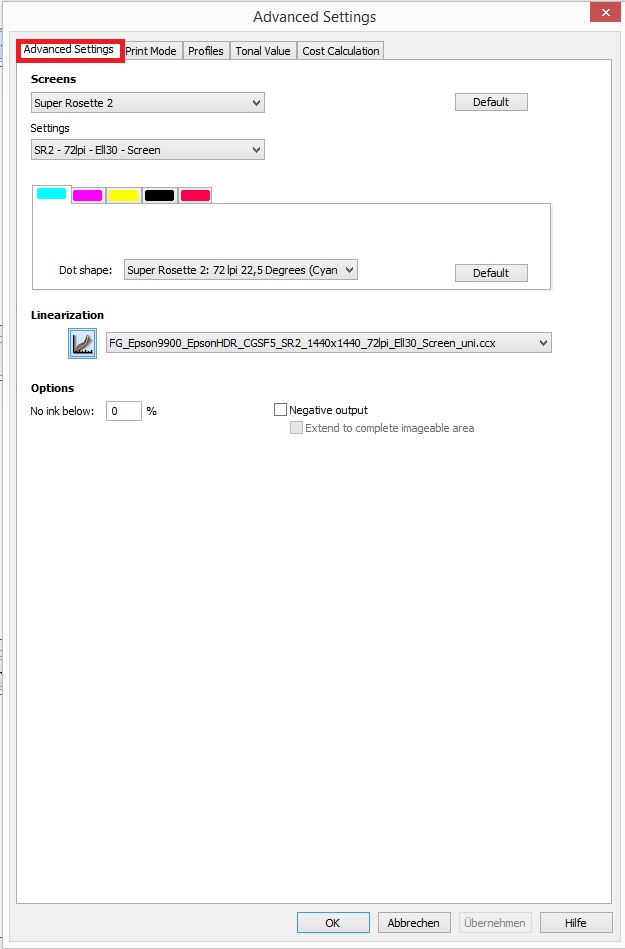
On the “Advanced Settings” tab, the screening method needs to be chosen.
Next to a free definable CustomScreen, we offer a supercell (SuperRosette2), a hybrid and a stochastic screening.
The pros and cons for the different screening methods are described in our new Filmgate brochure.
In the following scenario we will focus on the best quality AM screening available, SuperRosette2.
After having “SuperRosette2” enabled, a list of raster sets will appear under “Settings”. These bitmaps are linked to the chosen printer resolution on the “Print Mode” tab.
In the case of “SuperRosette2”, the dot shape, angles and screen ruling is pre-defined by such a set. As it is based on a pre-calculated bitmap(supercell).
Finally you can choose the option “negative” if you need negative films for purposes like flexo printing. If you are going to use positive films for screen or offset printing, you
keep it disabled.
After finalizing your settings, please click “Ok”.
The creation of your MIM is finished after clicking on “Next” and “Finalize” in the following window:
End of Part 2
Missed something ? – Go back to Part 1 – Ready to Continue? – Start with Part 3 (release next week)
0 Likes