Take advantage of the combined strengths of Productionserver and Rasterlink.
To fulfill this wish ColorGATE decided to create a special driver that offers the best of both worlds. The RL-direct driver enriches Rasterlink with all Productionserver benefits.
What Productionserver does:
- PDF handling
- Profiling & Color Management
- Special Ink layering (white, silver etc.)
- Color Replacement
- Creating cut paths
What Rasterlink does:
- Print modes / quality
- UV lamps settings
- Specific micro weaving algorithm
How to setup?0
To enhance your workflow add the RL-direct driver to your system. Four simple steps are required:
- Step 1) Import Rasterlink profiles
- Step 2) Disable Colormanagement in Rasterlink
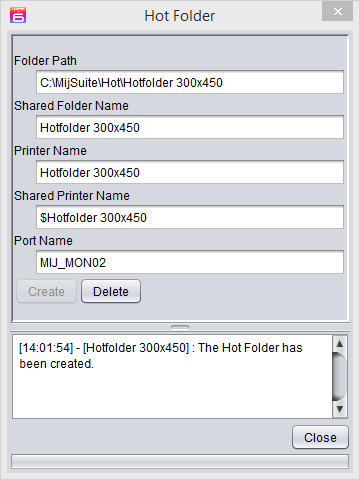
- Step 3) Hotfolder creation in Rasterlink
- Step 4) Set up the RL-direct driver in Productionserver
______________________________________________________________________________________
Schritt 1) Import der Rasterlink-Profile
1. After downloading you preferred Rasterlink profile from http://eng.mimaki.co.jp/ please open the Mimaki Profile Manager
2. Click “Device profile installation” and select the downloaded ICC profile.
3. After successfully installing the profiles close the Profile Manager
______________________________________________________________________________________
Schritt 2) Disable the CM in Rasterlink
It`s important to disable the Rasterlink Color Management to benefit from the advanced Color Management functions Productionserver offers.
1. Open Rasterlink and navigate to the Quality tab (Alt+Q) ![]()
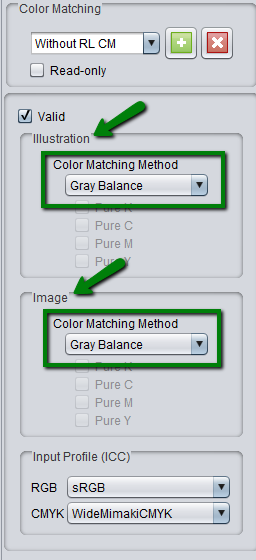
2. Please find the “Color Matching” settings on the right hand side. Change the name from “Default” to e.g. “Without RL CM” and click on “+”.
3. After creating the preset “Without RL CM” it is possible to disable the CM in Rasterlink. Please set “Illustration” and “Color Matching Method” to “Gray Balance”.
4. After changing the settings, please click the “+” button again to apply the changes to “Without RL CM”.
______________________________________________________________________________________
Hotfolder creation in Rasterlink
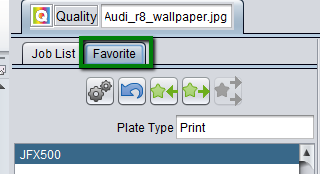
1. Open the Quality tab in Rasterlink ![]()
2. Open the “Favorite” tab in the left area.
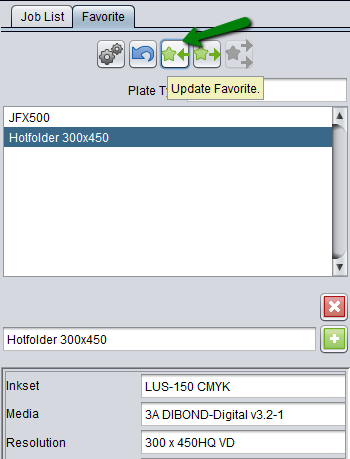
3. Choose a name for your hotfolder e.g. “Hotfolder 300×450” and click on “Create a new Favorite”.
4. Select the profile that you want to use for this hotfolder in the “Print Quality” tab. In this example we have chosen the 300x450HQ VD resolution.
5. Click on “Update Favorite” to use these settings in your hotfolder preset.
6. If all settings are defined, click the “Hot folder creation” button . The “Hot Folder” window opens. Now click “Create” to generate the hotfolder.
Please note: The “Folder Path” of the hotfolder which is set in the Rasterlink must be identical to the destination path in the RL-direct driver which is set in Productionserver.
______________________________________________________________________________________
Mimaki RL-direct creation in PS9
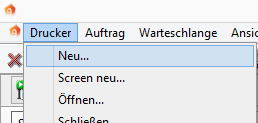
1. Open Productionserver, click “Printer”, and select “New…”.
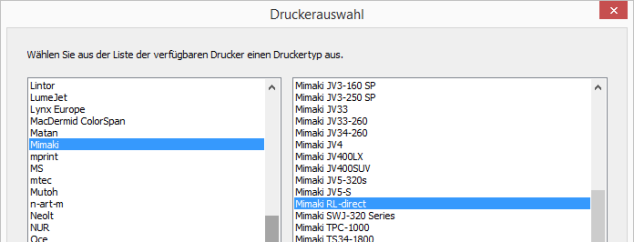
2. Choose the Mimaki RL-direct driver and click “Next >”.
3. The “Import MIM” dialog opens. Click “Import MIM…” if you have an existing MIM, otherwise click “Next >”.
4. Select the path to the hotfolder that was created in Rasterlink (Step 3) and click “Next >”.
5. Define the paths the driver will use. The following paths can be defined: Archived Jobs, Printer Definition and Hotfolder. Click “Next >”.
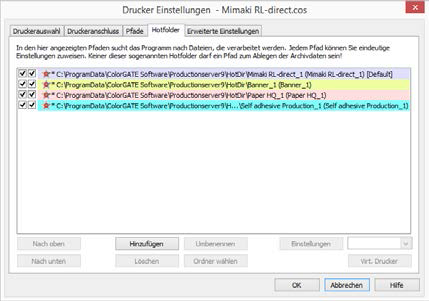
6. In the “Hotfolders” dialog the default hotfolder settings can be defined and additional hotfolders can be added. Click “Next >”.
7. Click “Finish” in the “Advanced Settings” dialog to create the driver.
______________________________________________________________________________________
Printing with special inks
1. To print with special inks (white, silver, primer, or varnish) first the job has to be imported into Productionserver.
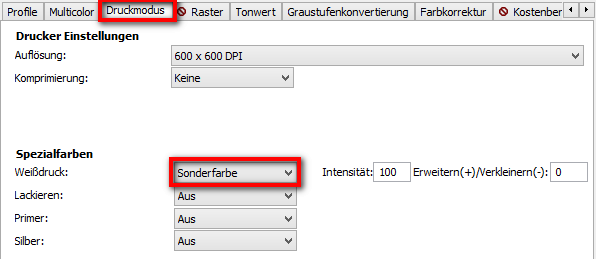
2.Now double-click the job and open the “Color” tab. After clicking the “Settings…” button navigate to the “Print Mode” tab. In this tab simply activate the special color (in our example we set “White” to “Spot”).
Please note: These settings can be stored to the MIM as default settings by clicking “OK” and “Store to MIM” after the window has closed.
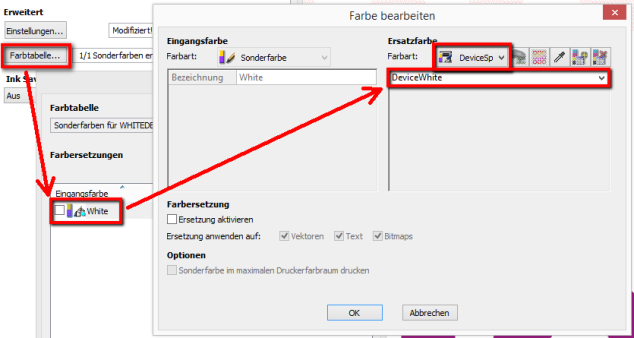
3. After confirming with “OK” it is necessary to replace the spot color for the job accordingly: Click “Color Table…” on the “Color” tab, double-click the replacement color, and select “DeviceSpot” and “DeviceWhite” as displayed in the screenshot. Now the settings dialog can be closed.
4. As a last step in Productionserver we recommend to control the spot color replacement. If it is replaced correctly the spot color areas are replaced by a red pattern (see below). If this is correct, the job can be printed.
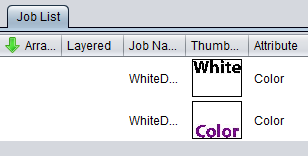
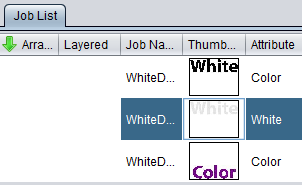
5. After the job has been printed in Productionserver one file per layer is created. In our case two files — one for white, one for color. The files are imported automatically to Rasterlink :
6. Now it is necessary to select the “White” job and click the “Special plate” icon on the right hand side. ![]()
7. Select “Valid Pixel” and make sure that the right ink set (here “White”) is selected. Click “Create”.
8. Once this is done a separate white layer is created and the job is ready to be printed. Just send the white and color layers to the printer as you know it from Rasterlink.
If you have any further questions, please do not hesitate to contact us.. Your ColorGATE Support-Team.
0 Likes


