

In the past the upgrade from one version to another needed to be done manually and took time and patience. Thanks to the integrated function for backup and restore back then in version 8.11 the update can be done fully automatically and without hassles.
Please note that 8.11 and 9.0X can also be run with a V10 Dongle and these versions can be installed on the same system.
Naturally everything starts in the old version. Just choose Options > System Configuration > Backup.
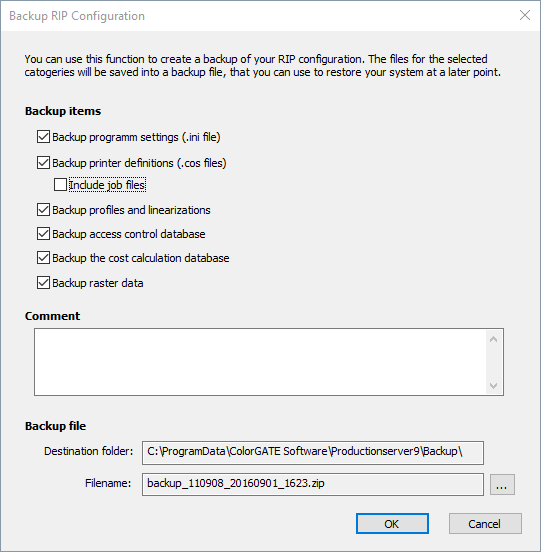
Under “Program settings” you can find for example your measurement device settings or which printer is active at the moment. Under “Printer definitions” the hot folder settings will be saved, you can even include your job files if you would like to transfer them to your new system as well. This way you can reprint files, without ripping them again in your Version 10. When you choose “profiles and linearizations” not only will all profile and linearization files be saved but also your MIM combinations. If you are using the cost calculation or the access control database you can also save the databases to use in future versions. “Backup raster data” will only be visible if you were using FilmGATE or PlateGATE or their modules. This is important for customers using custom screen sets.
Use the comment area to take notes on the back up so later you can better understand why the backup was made.
The destination folder and file name can be changed at will of course.
One click on “OK” and you will see what the uncompressed size of your backup data is.
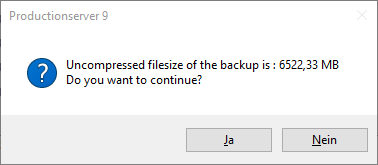
The more files you have the longer it will take to save your back up. When you choose “Yes” all your files will be ZIPed to save space and saved. Be advised if several Gigabytes need to be saved this can take over 10 Minutes.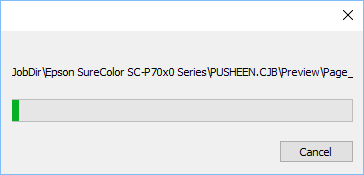
When saving has been completed you will then be asked if you should be reminded of the next back up.

Note: If you encounter problems when creating the backup from V8.11, we recommend installing the latest hotfix, that you donwload via the following link.
Now you have backed up your old version and can continue with V10. Please start V10 with Administration rights so there will be no problems with writing privileges.
Then go to Options > System Configuration > Restore and open the Backup file
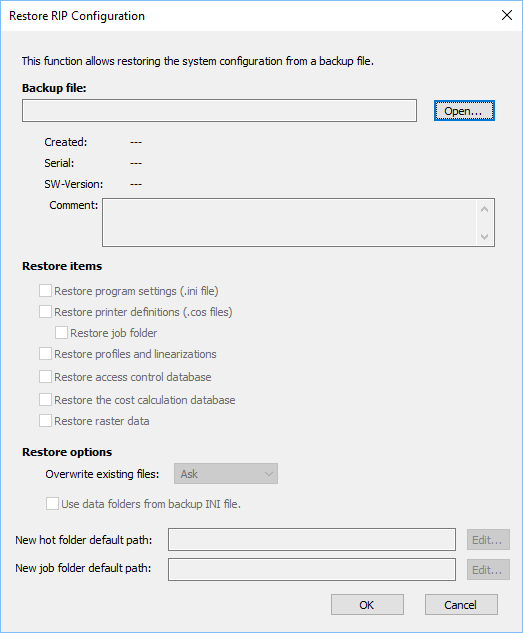
Choose “Open” and go to your backup file.

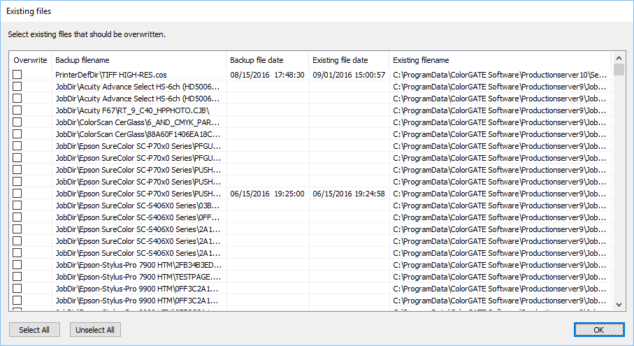
As you see, you will be informed from which version the backup file was made and what has been saved. You are able to control what should be imported in the “Restore items” check boxes. The blue “i” informs you that this backup has been created in a different version than what you are using. Under “Restore options” you are able to choose how overwriting of existing files should be handled and if the data folders from the backup INI should be used or not. You can also choose if the Hot and Job folder paths should remain the same or you can also direct them how you would like. When you choose “OK” you may receive a window which asks you which existing files you would like to overwrite. When upgrading from different versions you may for the most part overwrite all files.
After importing all settings the software informs you that it needs to be restarted.
Once this is done the data which you have imported is visible and you can work in V10 as you did in the old version. It is advisable to check all of your hot folder settings to see if there were no problems during the update and of course to see the new options and possibilities in V9.
When you are sure that everything is available in your version 10, you can uninstall to the old version to save disk space.
0 Likes