

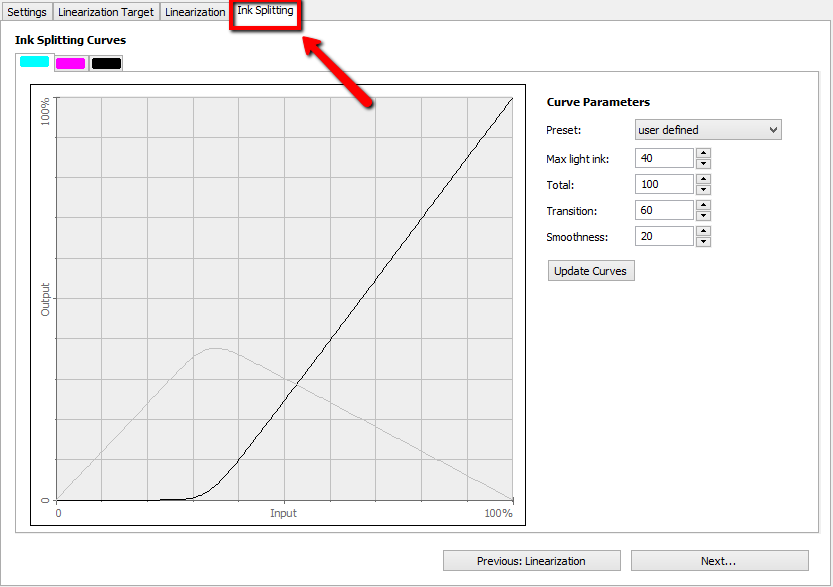
In this blog entry I would like to explain the functionality of the different settings when using Ink splitting.
What exactly does the ink splitting do?
- The ink splitting defines the transition of the light and full color inks such as Light Magenta to Magenta. This is why the separation is only available when using color modes with light colors.
Under „Preset“ you can find standard settings, I will touch on each of them below.
User defined
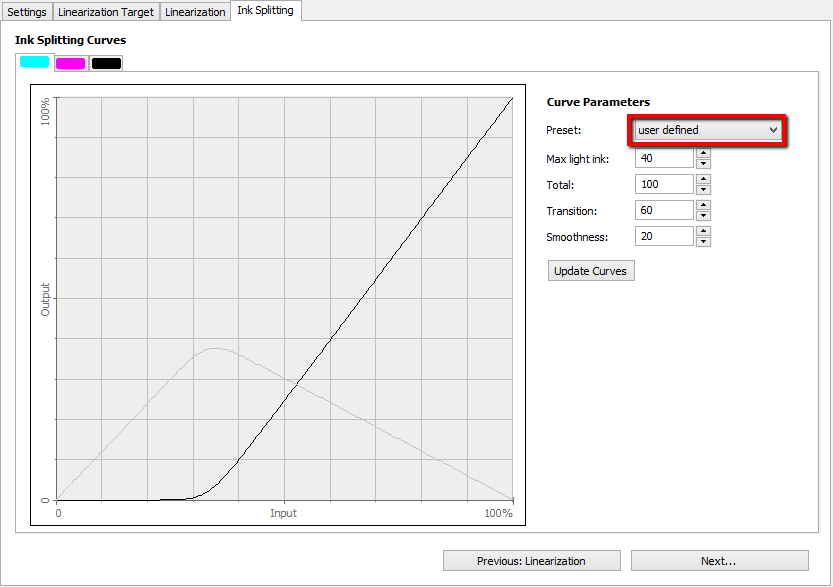
User defined: Here you have full control of all settings. Tip: Only experienced users should use user defined settings. With full control of the curves there is a greater possibility for poor print quality
Description of the settings:
- Preset: Predefined Ink Curves
- Max. Light-Tinte: Determines the upper limit of used light colors. Maximum is 100. The higher the value the more ink usage!
- Total: Determines the upper limit of printed full colors. Maximum value is 200. A value of around 100 is the default. The higher the value the more ink usage!
- Transition: Determines the usage of light colors regarding increased color coverage. The higher the value the longer light and full colors will be printed combined. Maximum value is 100.
- Smoothness: Determines the smoothness of curves, 20 is the default and sufficient.
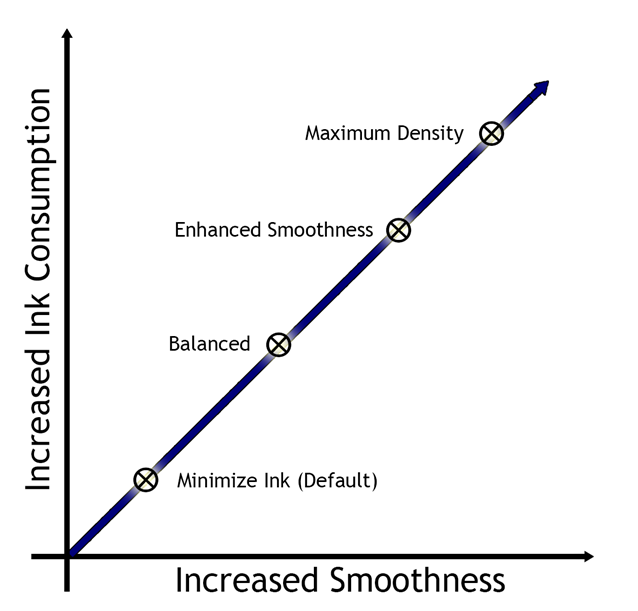
Minimum Ink (Default)
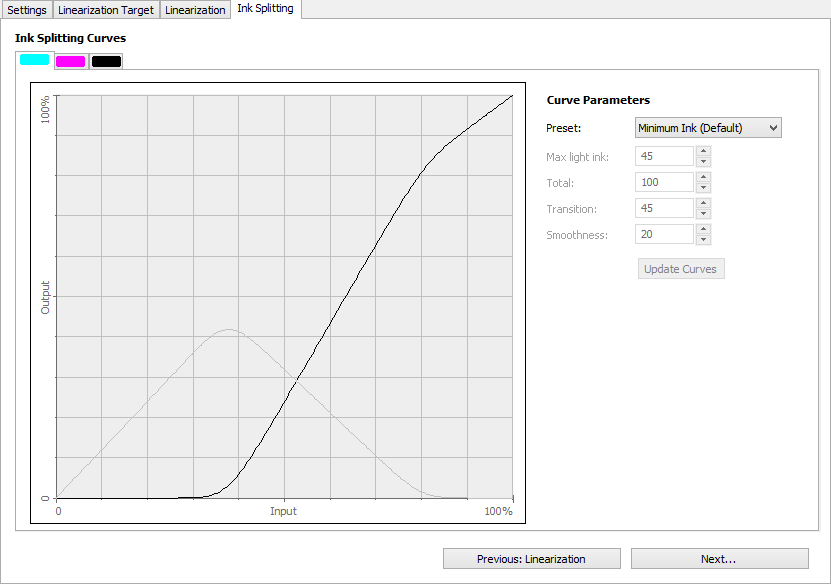
Minimum Ink (Default): This is the standard set. As you can see in the example curve we are only using a total amount of 100. After starting with LC the change to the full Cyan is happening at 45%. Where then the lights are slowly removed and the full color takes over. Choose this option to gain an acceptable printout but with high ink reduction.
Maximum Density

Maximum Density: Very high usage of both light and full colors. This would be a suggested setting for a UV printer when a high saturation and maximal smoothness is required. This setting is also interesting when creating a fast profile with a lower resolution without losing coverage and saturation. A negative aspect however is the higher ink usage which could lead to problems of the ink drying.
Enhanced Smoothness
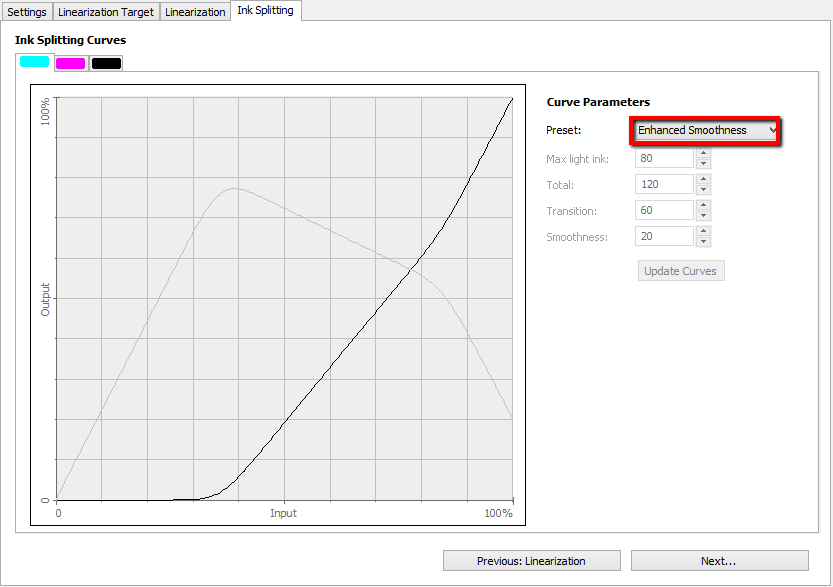
Enhanced Smoothness: Different than our default setting enhanced smoothness does not have a max light ink of 45 but caps at 80. This keeps the light inks in longer enhancing the transitional colors such as skin tones and gradients. This setting would help and be suggested when you are getting a very grainy print out. Be advised this also increases ink usage and again could cause problems with ink drying.
Balanced
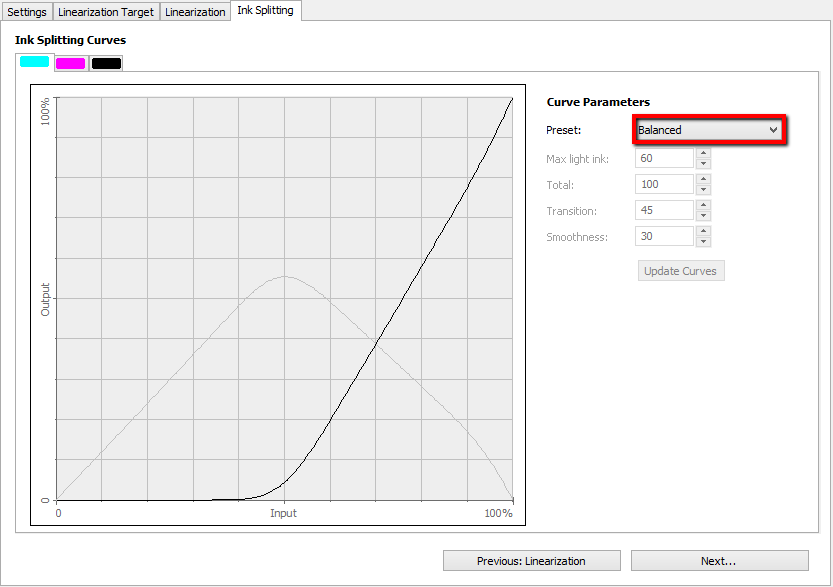
Balanced: The Balanced is a middle point between the enhanced and default. This should not be used however when the inks must be highly restricted in the total ink limit.
Here you can see the relation of ink consumption to smoothness of the predefined settings:
I hope this entry was helpful and helps you to create even better profiles in the future.
Have fun testing and using! 🙂